Showing posts with label baking. Show all posts

Sunday, September 20, 2015

Rustic Plum Cake

My CSA gave us a bunch of those prune plums and my Cook's illustrated cookbook has a yummy sounding recipe that I can now try!


As usual, I love their little notes at the beginning of the recipe. For this one it says
To get to an easy-to-make plum cake recipe with a hefty plum presence, we settled on a batter in which ground almonds replaced some of the flour, for a moist, rich cake that was strong enough to hold the plums aloft. Although Italian plums are well suited to baking, their season is too short to make them a practical choice. Instead, for our plum cake recipe, we poached supermarket plums in a few tablespoons of jam and brandy to brighten their flavor and keep them moist.
Oh boy - sounds great! It also gives us this information
This recipe works best with Italian plums, which are also called prune plums. If substituting regular red or black plums, use an equal weight of plums, cut them into eighths, and stir them a few times while cooking. Arrange slices, slightly overlapped, in two rings over surface of cake. Do not use canned Italian plums. Blanched whole almonds can be used but must be processed 30 seconds longer until finely ground. The brandy can be omitted, but then you will need to melt the jam with 1 tablespoon water before adding the plums. Don’t add the leftover plum cooking liquid to the cake before baking; reserve it and serve with the finished cake or over ice cream. The cake can be served with lightly sweetened whipped cream.
Recipe can be found in the cookbook or via this link here.

So you start with some ripe prune plums, 2 tablespoons of jam (I used homemade jostaberry & bumped it up to 3 tablespoons) and 3 tablespoons of brandy.


The jam & brandy go into a skillet on medium heat until it thickens a bit.


Then you add the plums (cut in half, pitted &  face down) in skillet. Shaking pan gently so plums don't stick and cook about 5 minutes. Then let cool as you make the cake.


Get that 9 inch springform pan ready and oven pre-heated to 350.


Process the sugar & almonds in a food processor until the nuts are finely ground (about 1 minute). Add flour, baking powder, and salt - pulsing to combine (5 pulses).


Add butter and pulse until mixture resembles coarse sand, about 20 pulses.


Pour batter into prepared pan. Smooth top with rubber spatula. Stir plums to coat with syrup. Arrange plum halves, skin side down, evenly over the surface of the batter. Spoon syrup onto halves.

Wow - this is super easy, no bowls for mixing - just the food processor. Well and that little bit with the skillet at the beginning.


Bake until cake is golden brown and toothpick inserted in center comes out with a few crumbs attached, about 40-50 minute.


Run thin knife around sides of cake pan to loosen. Cool in pan on wire rack until just warm or to room temperature, at least 30 minutes. Dust with confectioner's sugar and serve. Yum!

postscript - what to do with the leftover yummy syrup in the skillet and that egg yolk? I added another egg to the yolk and whipped it up. Poured it into the pan (reheated pan first of course) and made a delicious omelet for my lunch


I added a few sprinkles of shredded sharp provolone cheese before closing up my omelet. Great leftovers solution! Delicious!
 

Monday, September 14, 2015

Perfectly Peaches!


On the way home from my book group weekend, we stopped at Bishop's Orchards in Guilford, Connecticut to buy some wonderful foodstuffs. They have great produce and tempting high end food items. Worth a visit if you are on the shoreline of Connecticut.

One of the items on my list was PEACHES. One of those baskets of utility peaches, so I could spend my day off making peachy things.

First thing - Summer Peach Cake. I have the Cooks Illustrated Cookbook and they have great recipes, all of which I want to try (all 890 pages...). The recipe can also be found on line here.  I love their little preambles....why this recipe works. This recipe has this introduction:

Why this recipe works:

To achieve the right texture for our Peach Cake, we sprinkled the peach slices with sugar and baked them in a very hot oven until they lost most of their moisture. Tossing the cooled peaches with crushed panko bread crumbs sopped up the gooey, viscous film that the peaches had acquired in the oven. (The panko gets incorporated into the cake as the peach cake cooks.) Adding some peach schnapps to the batter boosted the peach flavor and gave us a peach cake recipe that could be made even with not-so-perfect peaches.

So the first thing I do when preparing a new recipe is read it over and do any prep first. Like preheating my oven, preparing my pans (9 inch spring-form & baking sheet), getting things to room temperature (eggs) and melting my butter (recipe says to melt & cool).


Now to tackle the peaches. The recipe calls for 2 1/2 pounds of peaches. Mine are large peaches. So what does 2 1/2 pounds translate to in "number of large peaches". I found this helpful fact
1 pound of fresh Peaches will equal: - 3 medium Peaches, or - 2 cups sliced Peaches. from Westview Orchards (came up first in my search, sounded authoritative). 
I translated that into 6 large peaches. I think. I just cut them up.


Thought I was keeping track but can't be sure. What I did do was to first slice 24 1/2 inch peach wedges as instructed by the recipe and gently tossed them with 2 tablespoons peach schnapps, 2 teaspoons freshly squeezed lemon juice and 1 tablespoon granulated sugar. These are for arranging nicely on top. I put these aside. Then I needed peaches for the middle layer. So I sliced 4 more peaches and cut the wedges into 3-4 chunks each. These I tossed with 3 tablespoons schnapps, 2 teaspoons lemon juice and 2 tablespoons granulated sugar. I was preheating the oven to 425 degrees F and prepared a baking sheet by covering it with aluminum foil and sprayed with coconut oil spray. On this I spread the chunks of peaches with the juices into a single layer.
They baked until they were caramelizing and thickening at the edges of the pan, about 30 minutes. These came out of the oven and were set aside on a hot mat on my kitchen table to cool.


I reduced my oven to 350 degrees at this point.


Then it was time to prepare the batter.

I whisked the flour, baking powder and salt together in a bowl. Set that aside.


Then whisked 1/3 cup granulated sugar, brown sugar and eggs together in a bowl until it was thick and thoroughly combined. At this point, in went the butter I had melted earlier. I used the whisk and combined it well. Next went the sour cream and vanilla extract (didn't do the almond).
 Again whisking well until combined. Then the flour mixture and liquid mixture get whisked together until just combined (do not over mix). Set this aside.

Now we go back to those chunks of peaches that have been cooling. Sprinkly panko crumbs on top and gently mix together. The panko absorbs all the deliciousness of the caramelized liquid and is absorbed into the batter when cooking so no-one is the wiser.


Now we put this all together in the spring form pan. First I spread half the batter on the bottom. Then I gently spread the panko-ed peach chunks on top of that for my middle layer.
 I then spread the remaining batter on top. Then for our final pretty detail....I arranged my reserved peach wedges, slightly overlapping, in a ring around the outside of the top of the batter, Then arranged another ring in the inside. 24 wedges was the perfect amount. So professional looking!

Into the 350 degree oven this goes.

The recipe calls for 50 to 60 minutes until a toothpick inserted in center comes clean. I first set the oven for 50 minutes. Obviously not ready. Added 10 minutes. Still clearly not ready. Then kept adding 5 minutes or so to the timer and checking. Honestly it took about an hour and a half all together! And I think my oven usually runs hot. But it looks pretty and perfectly done. Hope it tastes good later!

Next - Peach jam....

There are a lot of recipes on line. But I don't like using pectin when I make jam. Or too much sugar. So I'm going with Martha Stewart's take, recipe here.  I'll process this jam so I can donate some to sell at our church fair and have some to give as gifts this Christmas. Martha has this to say about the recipe:
Preserve orchard-fresh flavor with nothing but sugar, lemon, and salt.
I really was making both these items at the same time. Once I got the cut up peaches in the oven for the recipe above I started to peel and cut up peaches for my jam.
I basically doubled Martha's recipe. So I prepared about 20 peaches. As I went along I pulsed them n my food processor and dumped them in my large pot.

 I peeled them directly into one of our large compost bins so that saved time for clean up. (yeah maybe it's gross displaying a picture of my compost bin...)

Then I mixed in roughly 2 1/2 cups of granulated sugar, a teaspoon of course salt and a "pour" of peach schnapps. (the schnapps was out from the previous recipe so I figured, "why not", It will intensify the peach flavor and the alcohol will burn off).

I put the big pot on medium on my stove top and let it slowly come to a boil.

 This took a long time. I stirred now & then. And then I just let it gently boil for a long time. Lots longer than the 12 minutes called for in the recipe. Maybe an hour. I let it boil down in size and become a bit thick. Really I stopped cooking it once I had finished everything else in the kitchen. I finished the cake (see above), washed all my dishes and prepared the canning jars and lids.


I wanted to finish up so I could eat lunch and finish my blog post. And then go correct a few papers. Then read my book.

Here are my jars of jam.

Here is my boiling bath.

And here are the completed jars. Yum.


Monday, June 22, 2015

Strawberry Banana Bread

A belated Happy Father's Day to all you fathers out there. We had a lovely day yesterday. We went on a hike on the new Tidal Marsh Trail in North Haven (a little difficult to find, but a beautiful 2 mile walk, with nice cooling breezes) and then our younger daughter Julia dragged us to the middle school and we ran on the track (1 mile, huffpuff) while we tracked our progress on our new RunKeeper app. Okay I only ran three laps (0.84 miles) so I'm working up to it. I'm really a walker but want to improve my lung capacity so hope to be able to do some running but not so much that I wreck my knees or further aggravate my plantar fasciitis. But how does this all lead to Strawberry Banana bread?

Well after a lovely dinner of grilled london broil & lamp chops and assorted veggies - we had homemade strawberry shortcake for dessert!  With super sweet and yummy strawberries from our local Pell Farms.  And I got carried away and prepared 3 quarts of strawberries for our strawberry shortcake. There are only three of us at home now. So we had way too many. And I was browsing through pinterest recipes to help my older daughter find a recipe for a sweet bread for her faculty breakfast this week and suggested she look for strawberry bread. Long story short - I found this recipe and thought this is perfect for ME!  We have an over-abundance of strawberries, some over-ripe bananas and I have some homemade yogurt. Of course I tweaked things a bit - so here is my version:

Strawberry Banana Yogurt Bread

Ingredients

1 ½ cups whole wheat flour
1 ½ tsp baking powder
½ tsp salt
½ organic cane sugar (or brown sugar)
2 large ripe bananas
2 eggs
6 ounces plain yogurt (or use vanilla or strawberry-banana - mine was plain, homemade)
2 cups diced strawberries

Directions

Preheat oven to 375 degrees, grease a loaf pan (mine is a pampered chef stone one).

Combine flour, baking powder & salt in a small bowl.

In a separate bowl, mash bananas thoroughly. Add eggs & sugar to the bananas and mix thoroughly. Then add the greek yogurt and strawberries. Mix very well so there are no lumps.

Pour the dry ingredients into the wet ingredients. Mix until just combined.

Pour your batter into your prepared loaf pan. If you have extra strawberries, scatter some on top of your loaf.

Bake in your oven about an hour until the top is golden brown and a toothpick comes out clean.

Cool at least 10 minutes before slicing.


Thursday, September 18, 2014

More Pumpkin Love

Well I'm hosting a pumpkin tasting tomorrow (focus is on rating ales). So I'm making some pumpkin goodies too. And we have a breakfast tomorrow at work, so I'll making something pumpkiny for that.

First two ingredient pumpkin brownies. Well I added an extra ingredient.
Limited edition, bought at Target.

And I stole this recipe from cookies and cups. I used one family size box of Betty Crocker Dark Chocolate Brownie Mix (19.9 oz) and a can of Libby's Pure Pumpkin (15 oz).  Added about a half of a bag of the morsels.
Mix it up well so there are no dry bits. Line a 9 by 9 pan with foil and spray.  Smooth into pan.

Cook at 350 degrees F for 30 minutes.

I also made pumpkin butter last night.  See Easy Pumpkin Butter for the recipe. Which I'll make one of those baked brie in pastry and put the pumpkin butter on top of the brie (and inside the pastry) with salted pecans sprinkled on top.

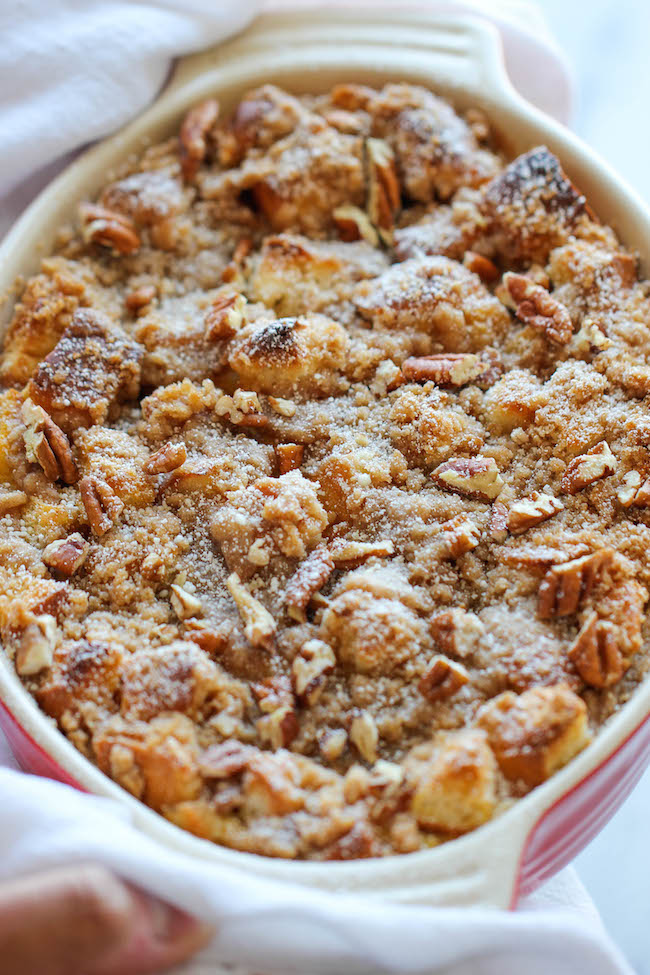
And for breakfast tomorrow morning it will be BAKED PUMPKIN CREAM CHEESE FRENCH TOAST from the blog "Damn Delicious". I always find great recipes on her blog.

And I mostly followed her recipe. Just I used whole wheat cinnamon swirl bread by Pepperidge Farms (about 1 1/2 loaves), egg beaters instead of eggs, increased liquid ingredients a bit and whisked in about 1/2 cup of pumpkin puree in the liquid ingredients. I omitted the nuts since this is a faculty breakast. And it's going in the fridge overnight.  Here's a picture from the blog, I'll try to add my own picture too tomorrow!

update - the bread pudding was a success!  Here it as a few minutes after I put it out for the breakfast:


Monday, September 15, 2014

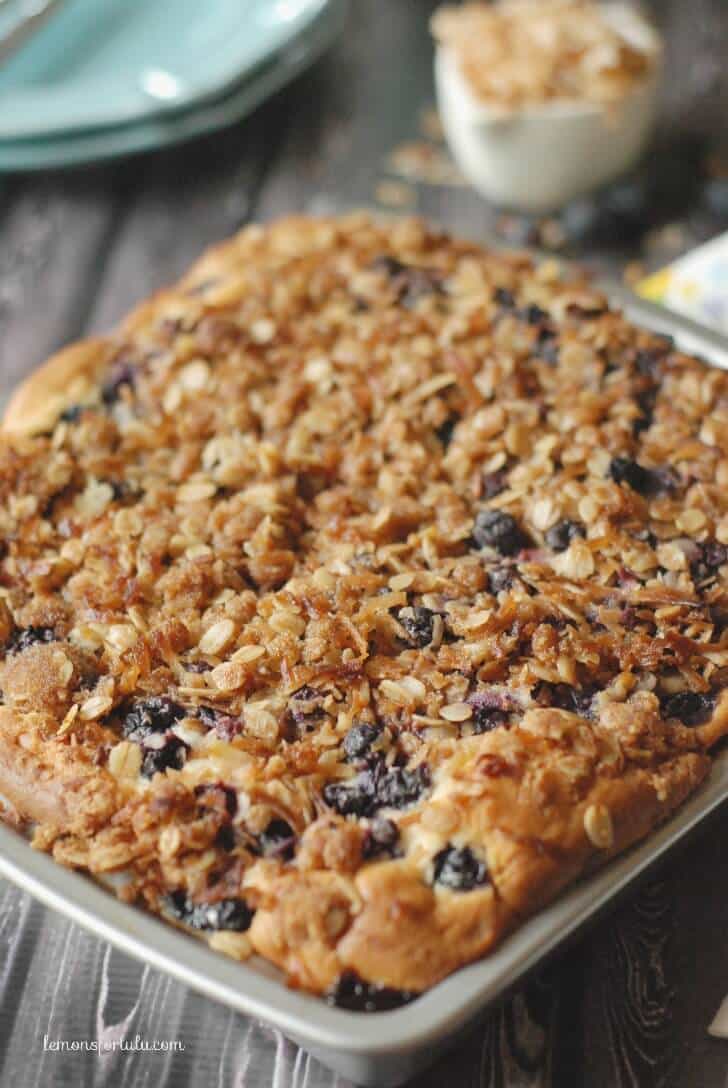
Blueberry Coffee Cake with Coconut Streusel

This delicious recipe was made at our book group planning weekend for Sunday breakfast!


which I found at "Lemons for Lulu" 

Some changes (I'm always tweaking things).  I didn't have buttermilk, so I used vanilla yogurt (about 1 1/2 cups) and I always use Stonyfield. This time I used lowfat but fatfree is good too.
Used 1/4 cup of egg substitute instead of the egg. And I didn't have enough blueberries so I used both blueberries and raspberries. Lovely.

Caution on cooking time - it lists 45-50 minutes cooking time. I checked it at 30 minutes and added maybe another 10 minutes in total and it was perfect. Overcooking this would result in a dry coffee cake, so definitely watch the cooking time.

I'm always trying new recipes (thanks book group for being a guinea pig for my cooking) but this is one I would definitely make again!